Reinventing the Wheel

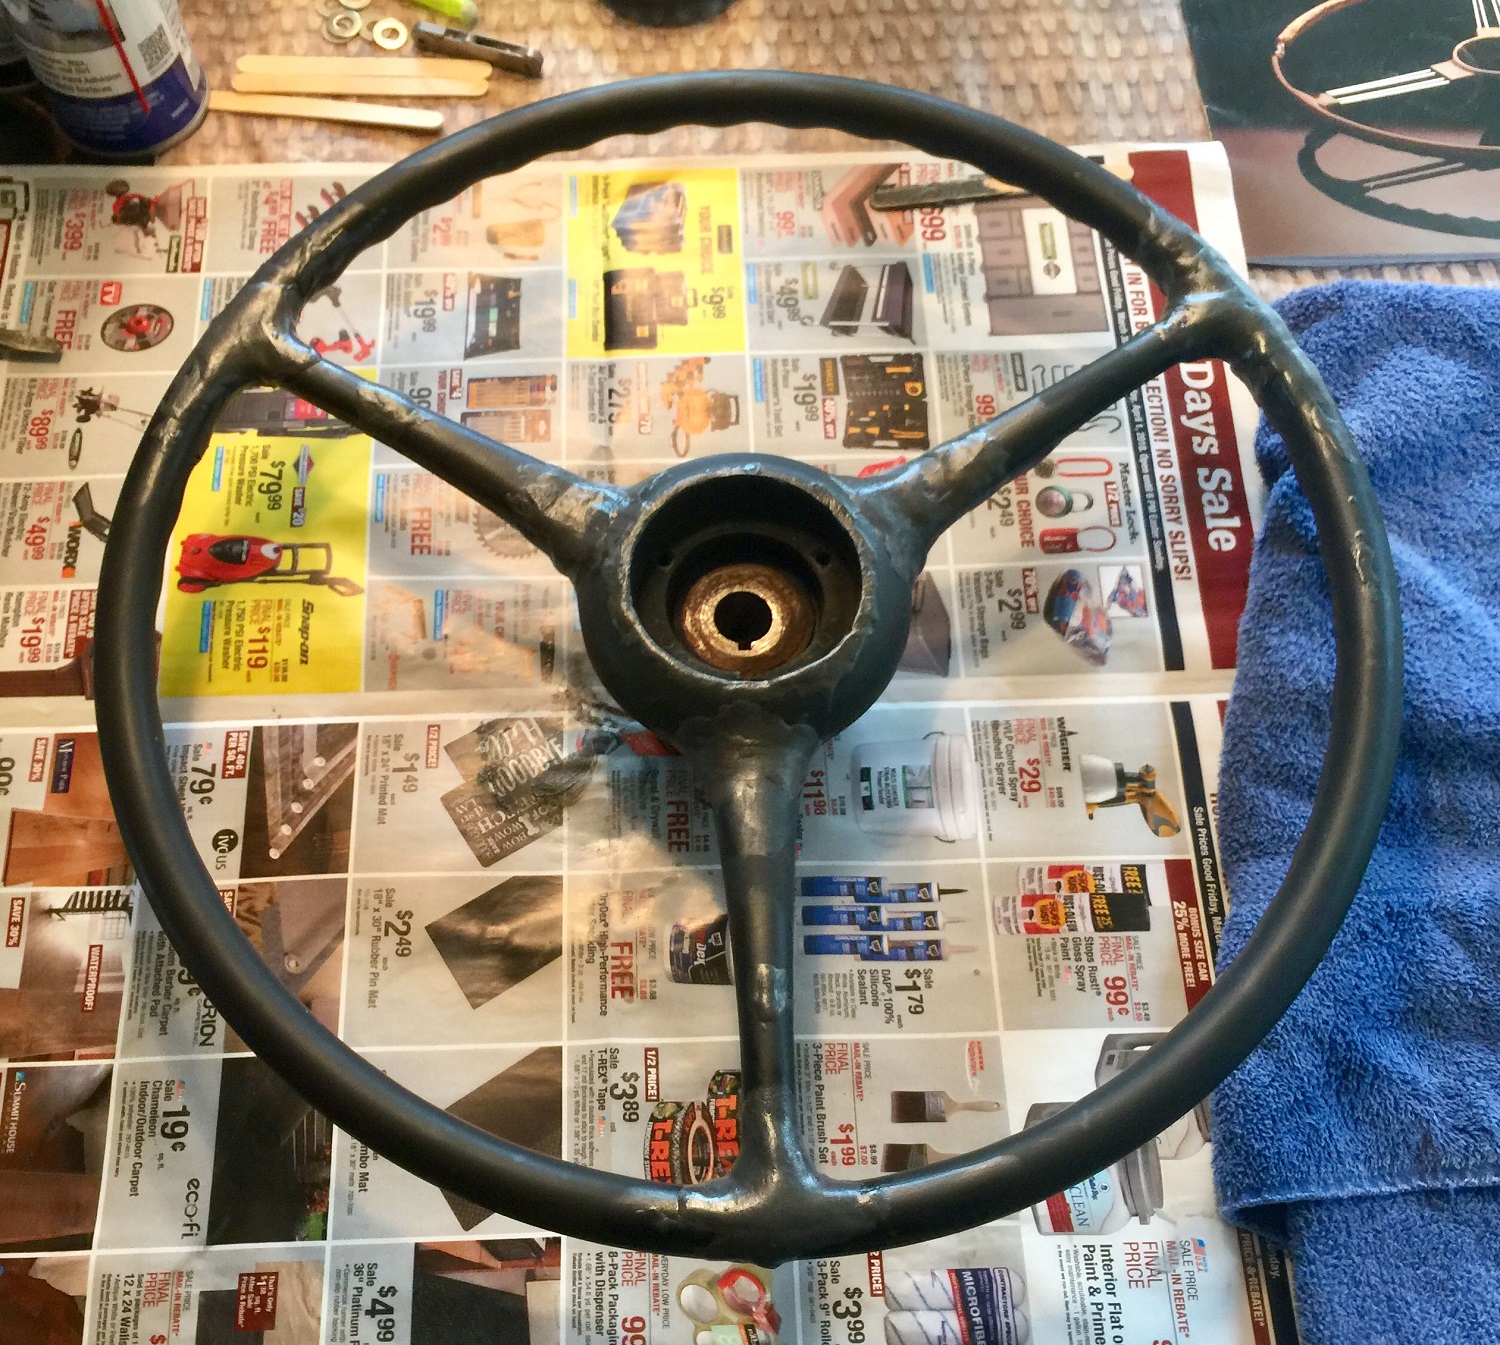
As long as the truck was up on blocks over the winter and early spring, I had decided to remove and restore the steering wheel – as you can see from the first photo, it needed it.
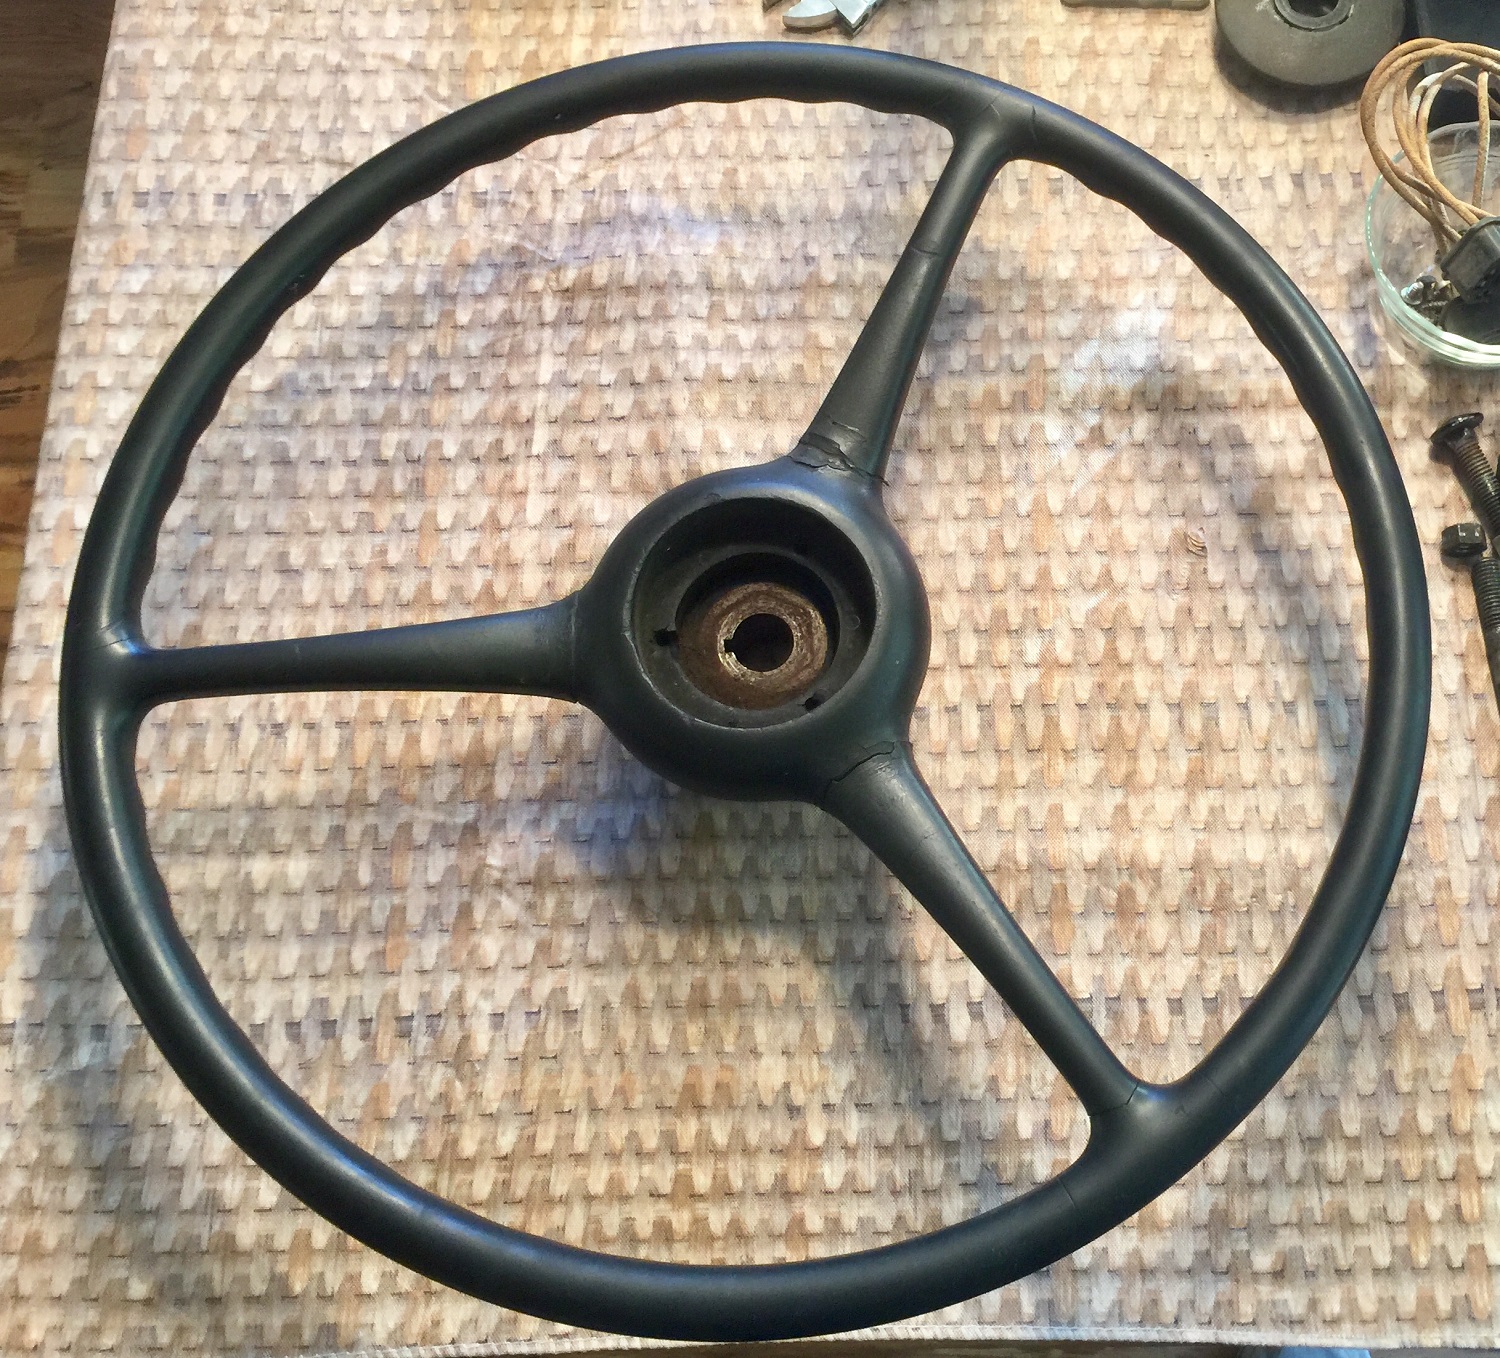
Steering Wheel Prior to Restoration – Lots of Fine Cracks Everywhere
Removal was actually pretty straightforward – you cannot use a conventional steering wheel puller, but a bearing puller works very well. Perhaps I was lucky, but it popped off with relative ease.
To guide me through the restoration process, I had purchased the Steering Wheel Restoration Kit by Eastwood. The kit includes an excellent guide, PC-7 epoxy, adhesion promoter and pre-painting prep. The kit is reasonably priced at $50 (as of the posting of this article).
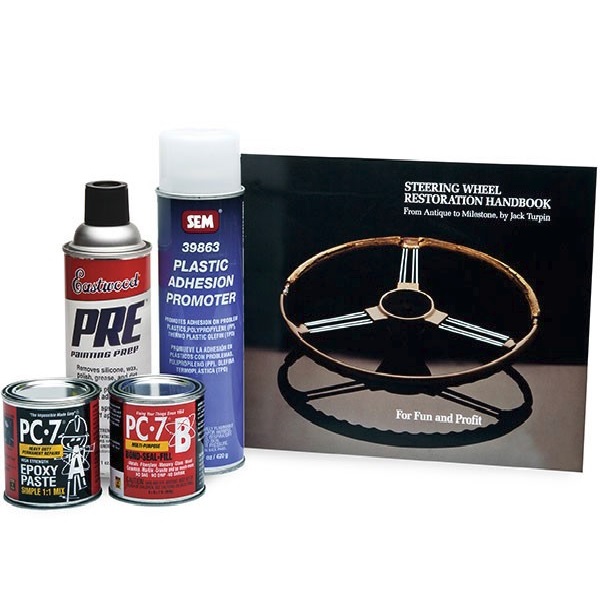
Eastwood Steering Wheel Restoration Kit (Retails for $50)
After cleaning the steering wheel as best as possible, I started the process outlined in the guide by grinding out all of the cracks using a Dremel tool. All cracks were widened, and if they weren’t already down to the metal core, they were extended to the core. This is to allow you to make sure the epoxy covers the full extent of each crack.
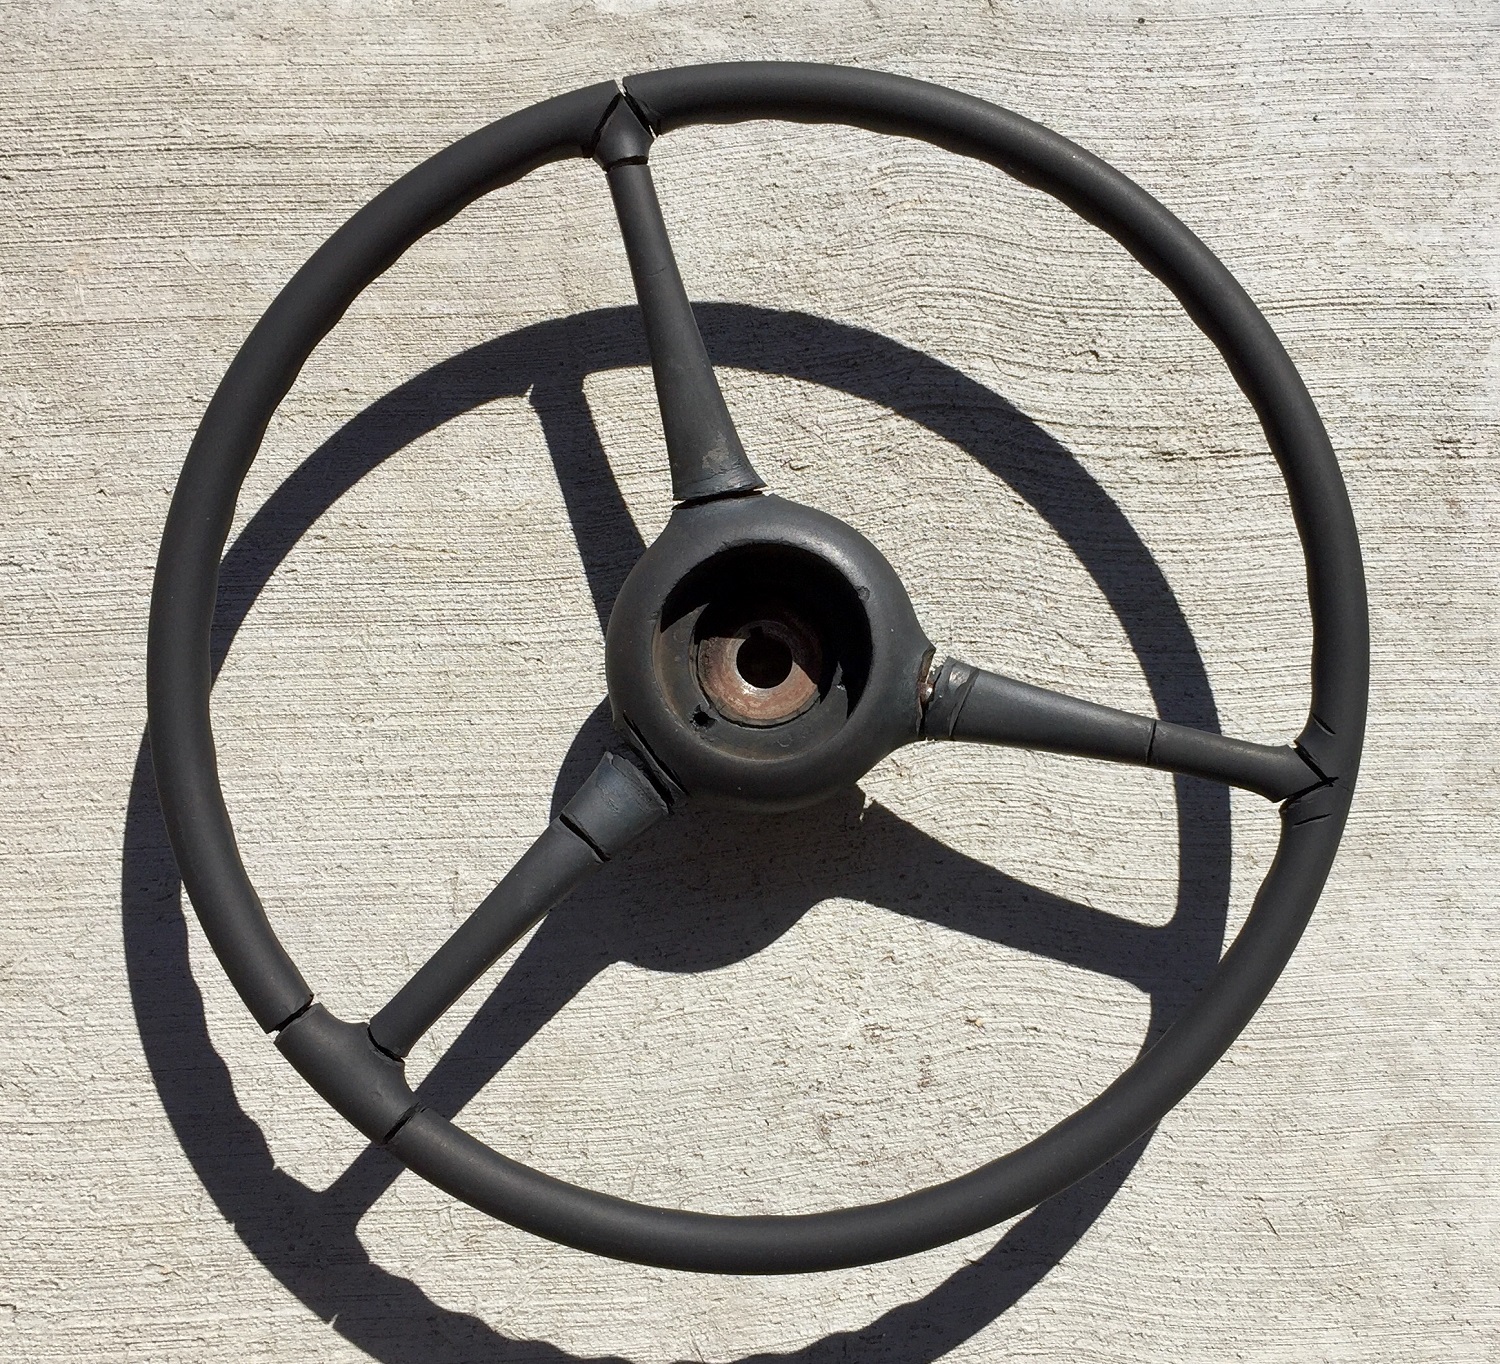
First Step of Restoration – Grind Cracks to Make them Wider and Make Better Access for Epoxy
After the epoxy dried, everything was sanded down. I started with a 100 grit, then finished up with a 400 grit.
Some people have used JB Weld instead of PC-7 for the epoxy, but having used both, it is my opinion that the PC-7 sands down a little easier, which helps a LOT in terms of getting everything smooth and saving time.
Second Step of Restoration – Liberal Use of PC-7 Epoxy Paste
After everything was sanded smooth, I used the adhesion promoter and pre-painting prep as per the directions. I then decided to use an epoxy-based primer. After the primer dried, I sanded everything down again with 400-grit sandpaper.
I finished up with three coats of gloss black epoxy, sanding with 600-grit between coats.

Steering Wheel After Final Painting and Reassembly
The steering wheel was then reassembled and reinstalled. I am VERY happy with how well it turned out! What was an eyesore in the interior, is now the jewel.
Finally, I want to make special note of the horn button center. I came across this item while looking for options as to what to do with my battered center. I came across this painted horn center at Nostalgic Reflections. The price might seem high to some of you, but considering the excellent quality, it felt like a value to me.
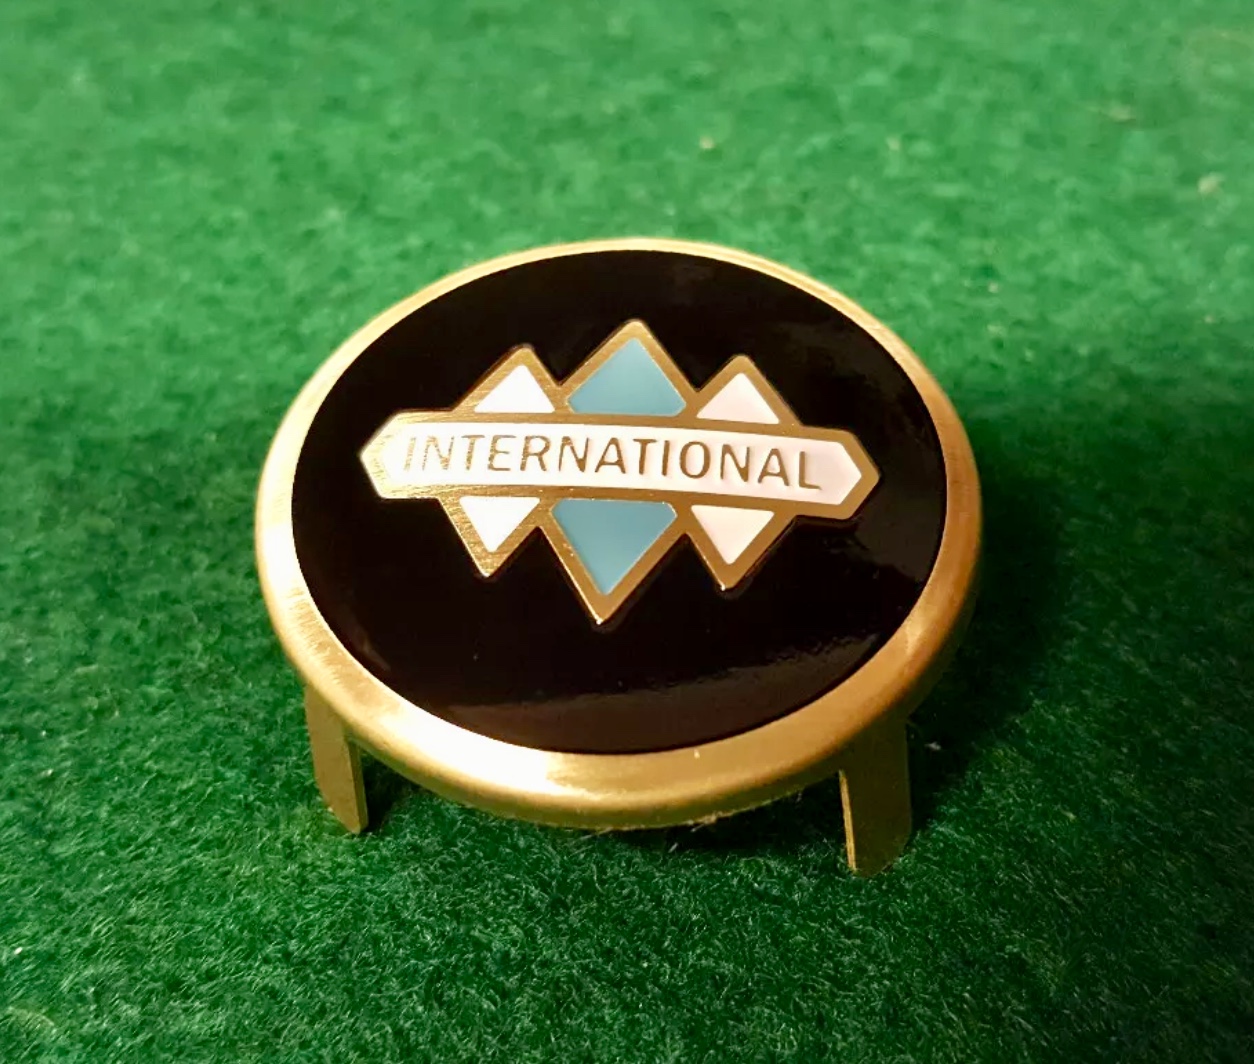
Horn Button Center by Nostalgic Reflections
“Cornelius”
Cornelius Specifications:
- Make: IHC
- Model: D-2
- Type: Pickup
- Capacity: 1/2 Ton
- Wheelbase: 113"
- Year Built: 1939
- Engine: HD 213