Reinventing the Wheel

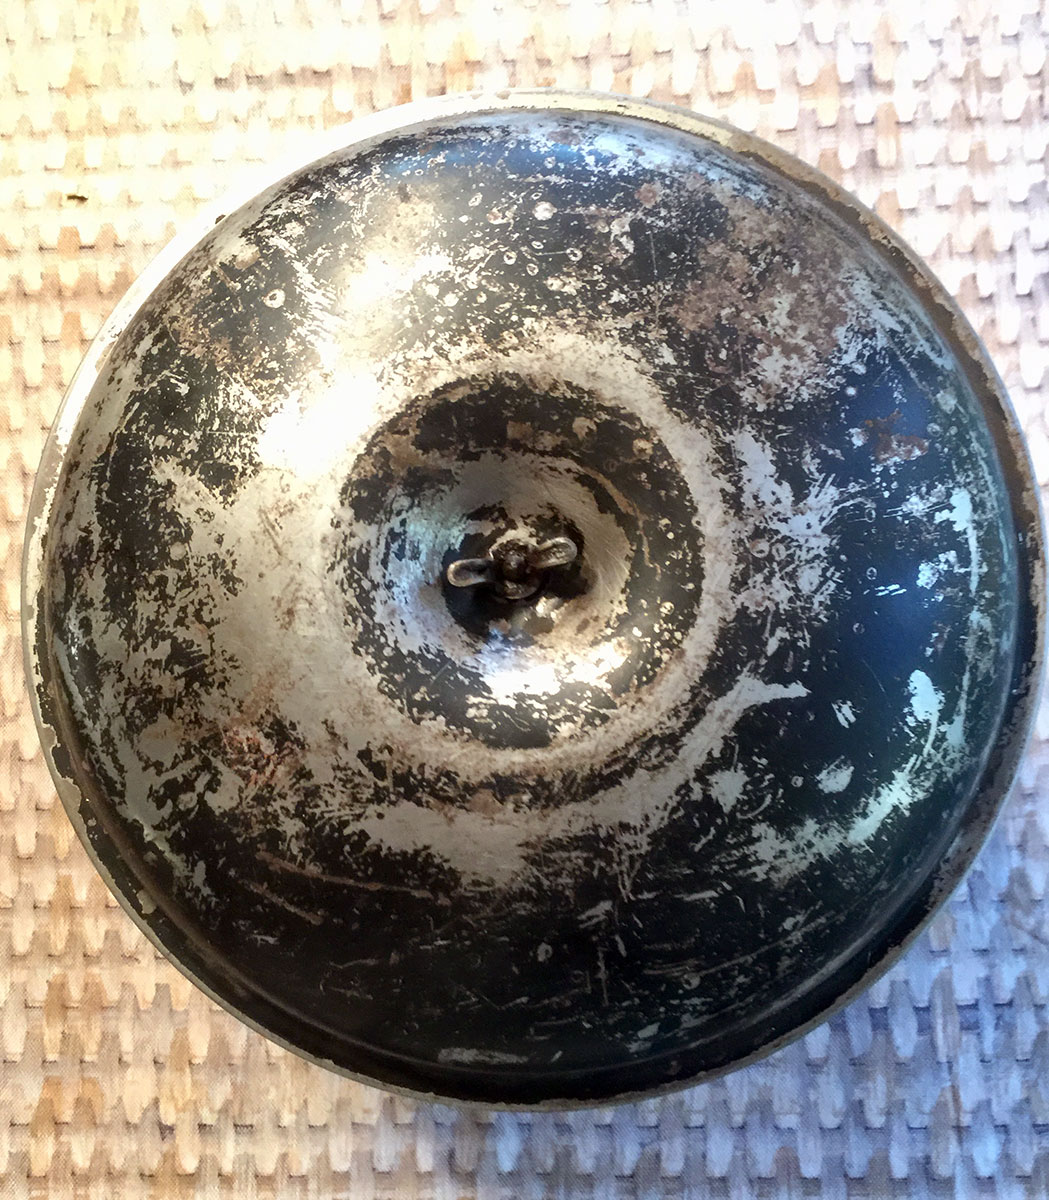
As long as the truck was up on blocks over the winter and early spring, I had decided to remove and restore the steering wheel – as you can see from the first photo, it needed it.
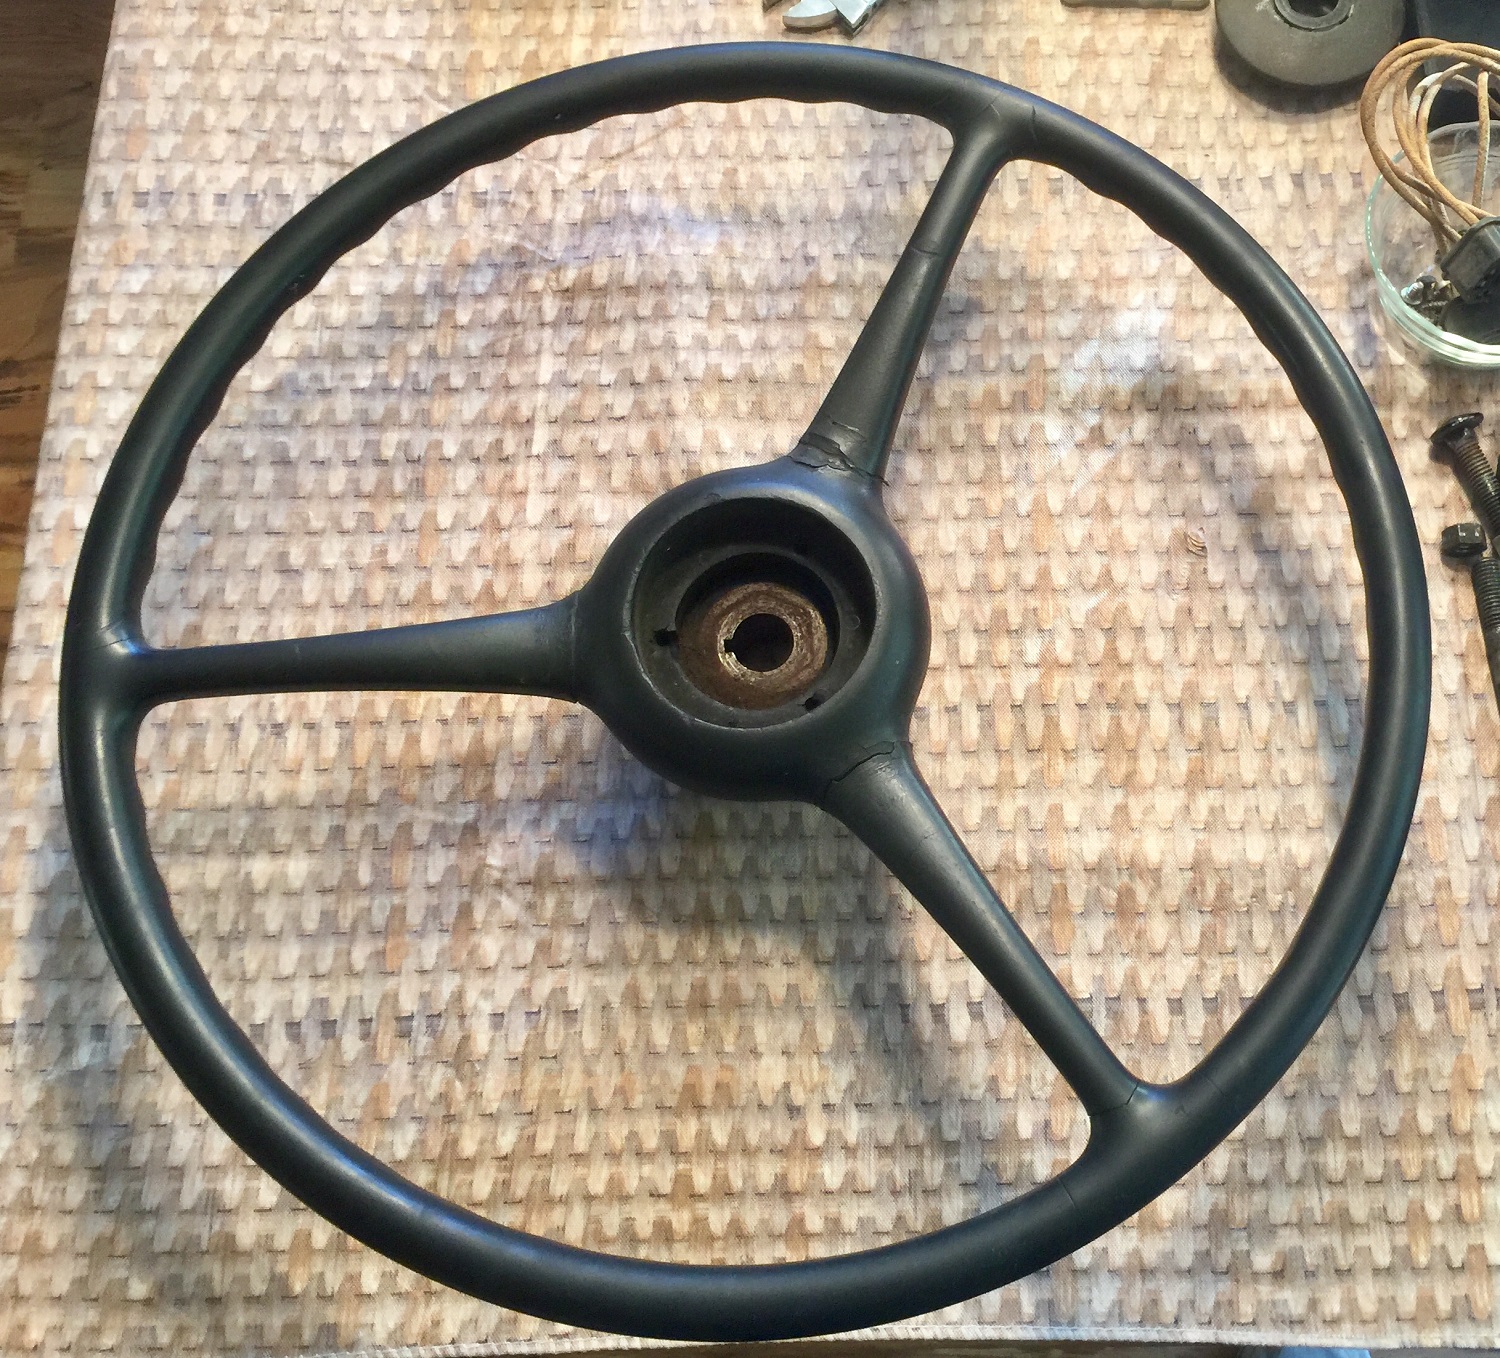
Steering Wheel Prior to Restoration – Lots of Fine Cracks Everywhere
Removal was actually pretty straightforward – you cannot use a conventional steering wheel puller, but a bearing puller works very well. Perhaps I was lucky, but it popped off with relative ease.
To guide me through the restoration process, I had purchased the Steering Wheel Restoration Kit by Eastwood. The kit includes an excellent guide, PC-7 epoxy, adhesion promoter and pre-painting prep. The kit is reasonably priced at $50 (as of the posting of this article).
Read MoreFine Tuning Your Carburetor
Although I have tuned countless carburetors over the years by “ear”, I decided I wanted to make sure I had tuned my trucks new carburetor to be as efficient as possible. Especially since my hearing is NOTHING like it used to be!
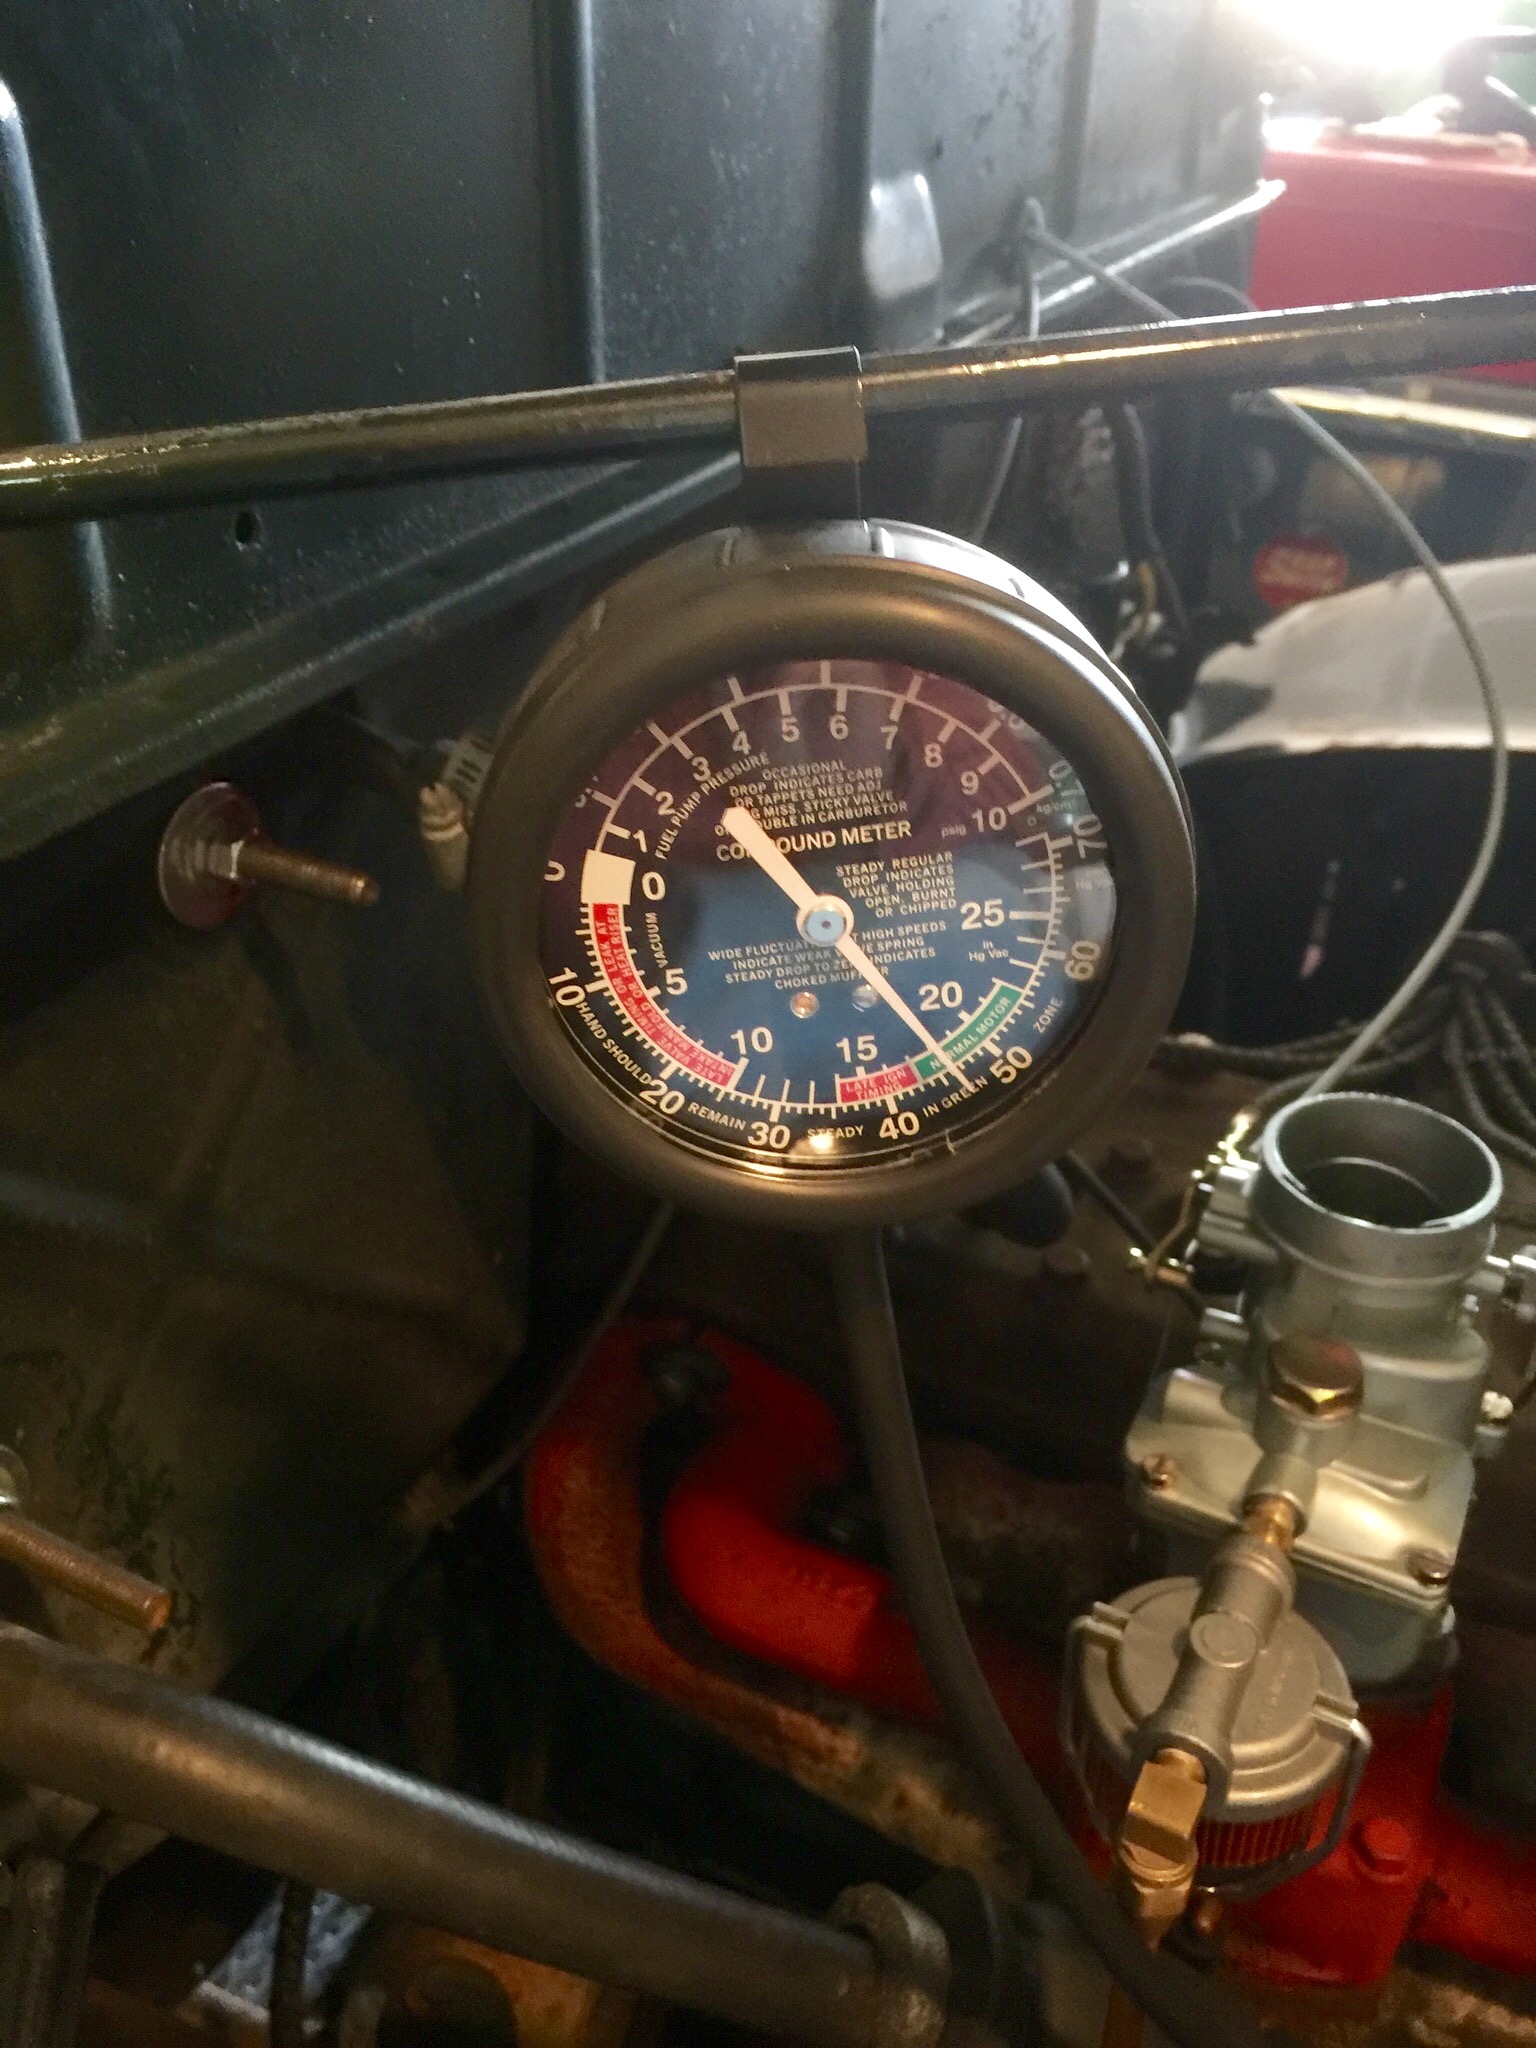
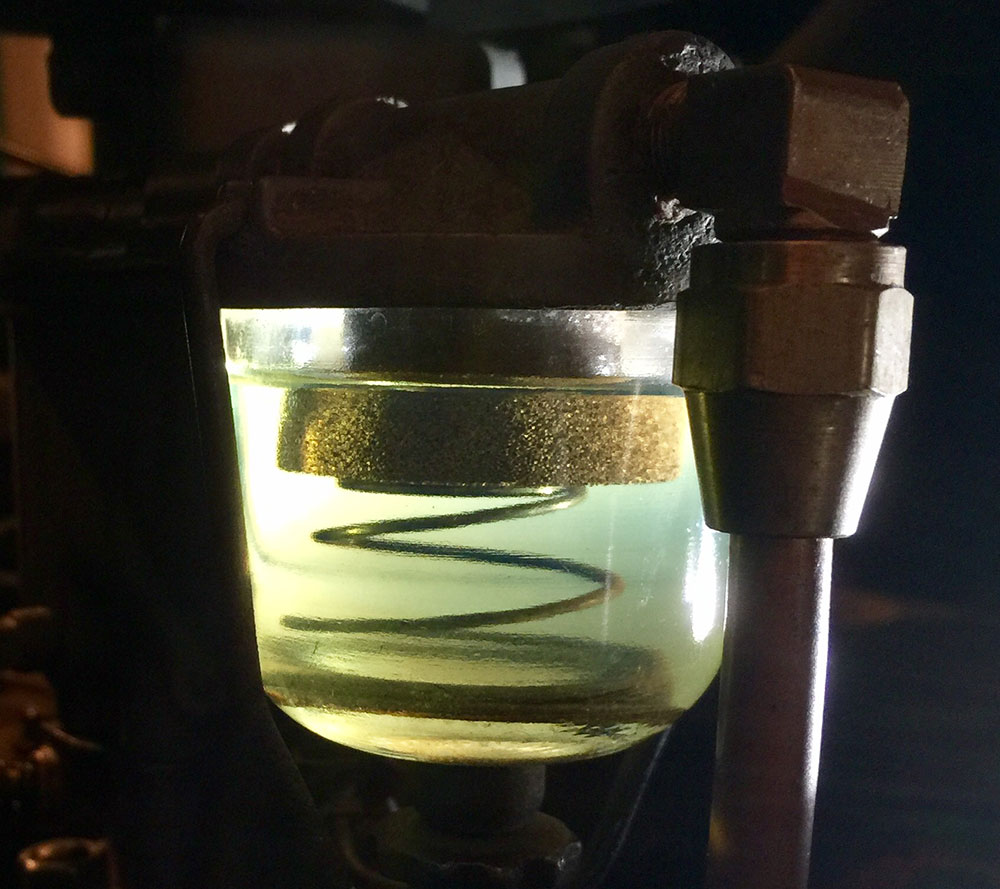
Tuning Carburetor With Vacuum Gauge
The next step in carburetor tuning is via a halfway decent vacuum gauge. You connect the gauge to a vacuum source – in this case I connected to the line right off the intake manifold that runs to the vacuum advance unit on the distributor. I immediately saw a wobbly reading of approximately 16.5 inches of vacuum. After adjusting the mixture, it rose to a little over 18 (you want to see between 18-20 or so) and was pretty steady. Also, the periodic “puff” in the exhaust decreased, which was good.
Read MoreTaking a Powder

Even though the truck is stored for the winter, I am fortunate in that I have enough room to continue working on it. So over the past few weeks, I have cleaned up a United partial flow oil filter and an original AC oil bath air cleaner. I then had them powder coated semi-gloss black. Thanks to Jay at Apex Powder Coating in Middleton, WI, they turned out amazing. The air filter media was difficult to clean prior to powder coating, and although I did my best, it still caused quite a bit of smoke at the powder coaters!
Air Cleaner Assembly Prior to Powder Coating
The air filter is pretty much ready to go now as is. I only wish I could find an original clamp for it. It had a regular hose clamp on it with a thin strip of rubber on it between the clamp and the filter. I will be doing pretty much the same thing for the time being.
Read MoreNew Fuel Line
So as I had noted in my last post, I felt that the main section of fuel line had to be replaced. I ordered a twenty-foot coil of 3/8″ copper-nickel fuel line and used my brake flare kit to set up a double-flare on each end. This line replaced what had previously been three sections of different types of tubing extending from the gas tank to the engine bay, each joined by rubber tubing and hose clamps.
Tubing Straightening Tool
The new line replaces all of that – the only line left in place was a nicely bent section extending from the driver’s side of the engine bay to the passenger side, where it connected to the fuel pump. From the fuel pump there is one more section of line extending to the fuel filter, which is then directly connected to the carburetor. I used an air compressor to blow out the lines I retained after they were drained of fuel.
Read MoreStumbling Along
Within a week or so after replacing the differential oil, Cornelius started to complain a little when going uphill. This was in the form of stumbling when the accelerator was applied.
Durex Fuel Filter Prior to Cleaning
My first steps were to check the fuel system and to clean the fuel filters in both the Durex Fuel Filter itself, and the fuel filter contained within the fuel pump. In the Durex unit, the fuel filter is composed of a brass porous element, which I cleaned by agitating it in Chemtool B-12 fuel system cleaner, then blowing through it with compressed air. The fuel pump filter was a brass screen, which was cleaned in a similar fashion.
The result of these efforts? Still stumbling.
Read MoreThat’s Rad!
At this point the truck is running pretty well, however I have been noticing some small leaks at the thermostat housing on top of the
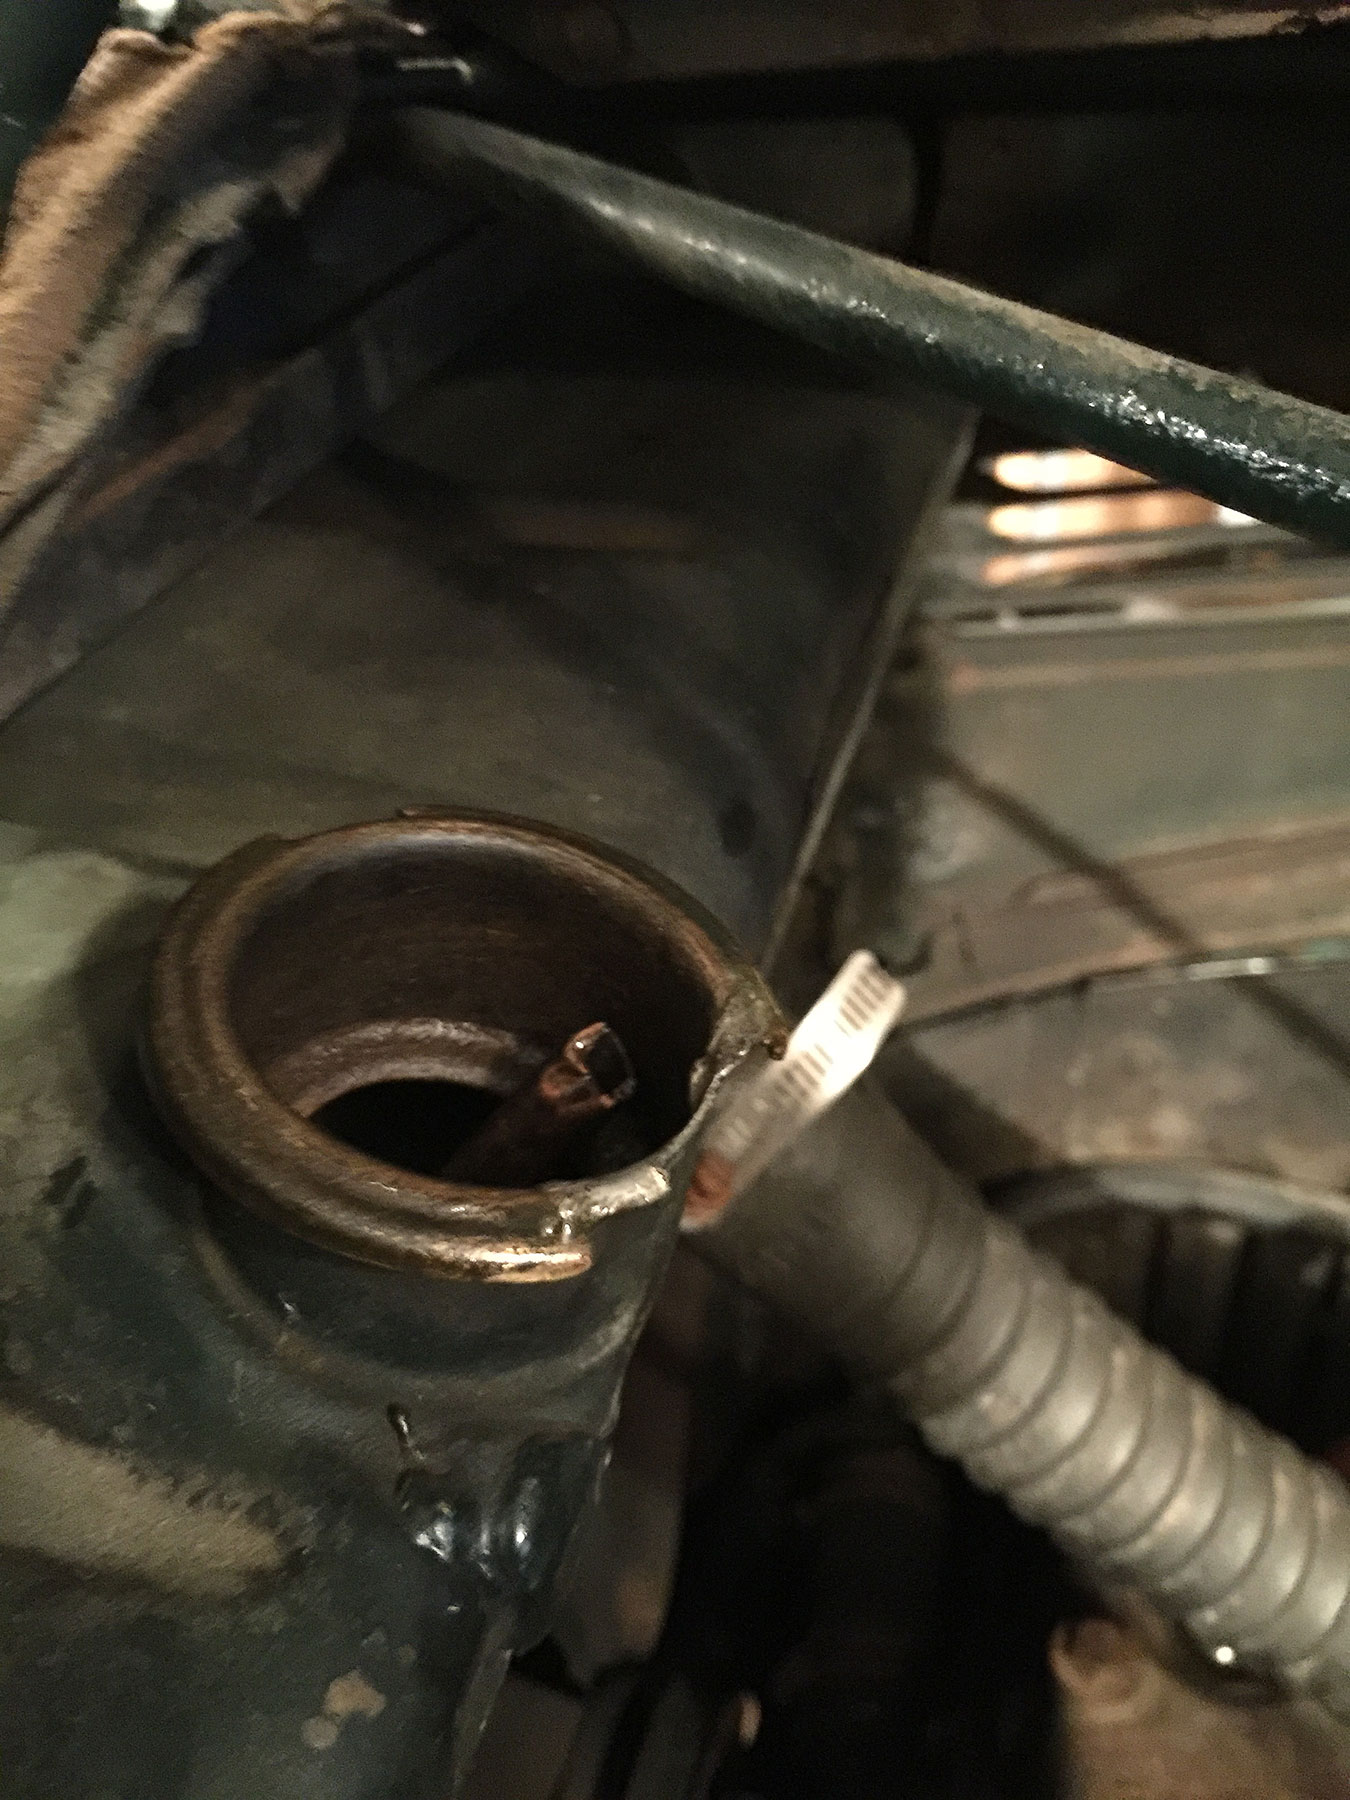
Damaged Radiator Inlet
head and there are also at least two or three small leaks within the radiator itself. On top of that, part of the lip on the radiator filler inlet has broken off, which does not allow the radiator cap to fasten properly. I have some work cut out for me. This effort pretty much takes up the month of July, all told.
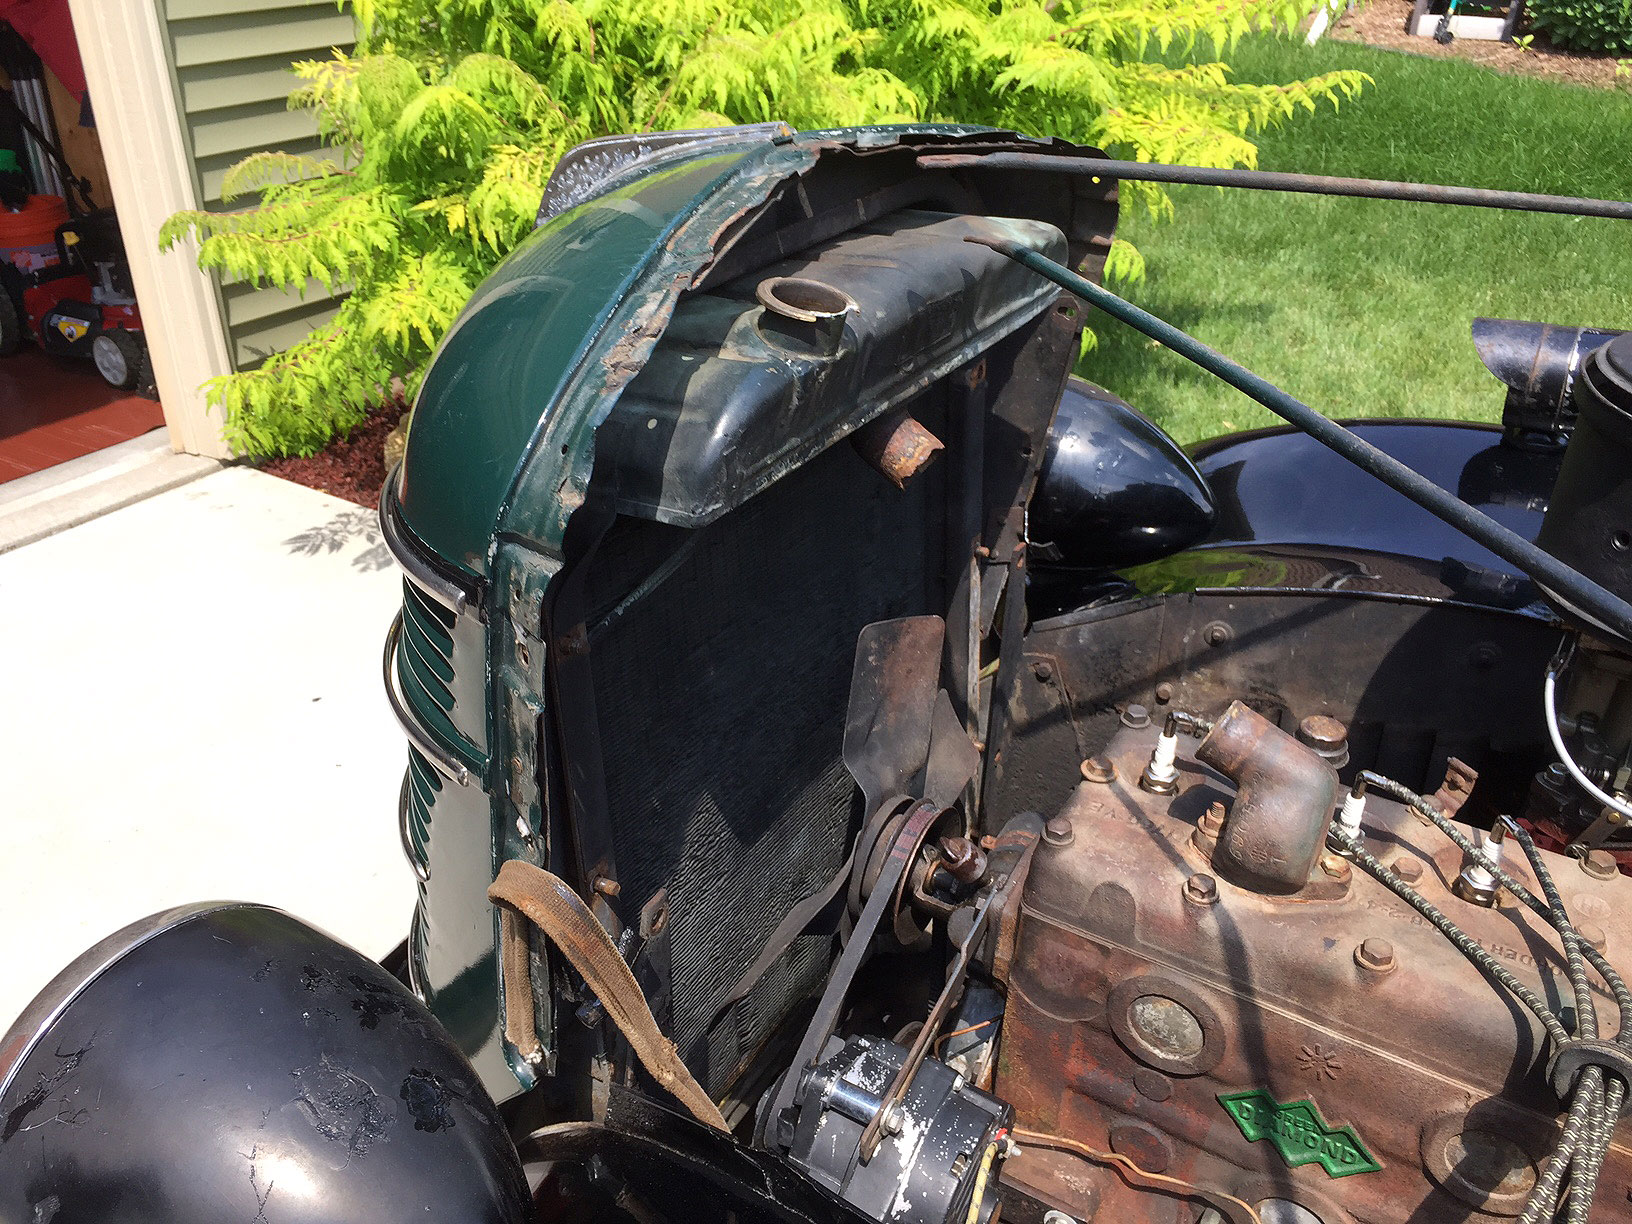
Removing The Grille and Radiator
I first start by sourcing parts, and thanks to the Old IHC forum (The finest IHC forum and excellent source of information, in my opinion, and not just because I have been one of the admins there since 2009!) I was able to obtain a part number for the thermostat (Stant 13368 / 180 degree). The thermostat housing gasket was available from Olson’s Gaskets (Very friendly, knowledgeable service).
Read More“Cornelius”
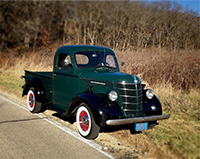
Cornelius Specifications:
- Make: IHC
- Model: D-2
- Type: Pickup
- Capacity: 1/2 Ton
- Wheelbase: 113"
- Year Built: 1939
- Engine: HD 213